Saturday, June 21, 2014

That ugly word gossip.

Hello this blog has been scarce and more centered on crafts/ creativity but I want to share something a little different with you tonight and I hope that it helps! Also just so you know I am a Christian and if you are not I hope this can still be encouraging, but it does come from a biblical belief.

While reading Ephesians tonight during a quiet time I came across a verse that I have read many times. This verse Ephesians 4:29 jumped out at me tonight. It reminded me of a sin I struggle with daily.

Even just today I gave in to complaining and gossiping so heatedly about somebody that I struggle with. It felt so good to vent about this person and to know that someone else was struggling with them. Yet, as soon as we had finished our session I felt awful. I knew I had given into my fleshly desires to berate and tear down this person who is loved by the God Almighty. And as a person who claims Christ how did that show my fellow gossiper that there is anything different about me? Thank God that it is not on my shoulders to save humanity!

That being said I do want to live a life that is different, set apart. I don't want to constantly excuse my behavior. I know that this is a continuous struggle of mine that I have to fight daily. And maybe, well really I know that a lot of us struggle with this same sin. So maybe this verse will encourage you as it did me. I am going to read this daily from this point to start my days out with this reminder to encourage and not tear down. I hope that it can provide the same encouragement to you my friends.


Wednesday, February 12, 2014

Miniature Owl Valentines

Owls are all the rage right now and I to have joined the fad. What can I say they are just to cute! 
I was recently inspired to make valentines packages for the girls in my family. 
I spent a lot of time searching for ideas of what to make.  I wanted to find something that was more than the normal candy. 
I found several crafts that inspired me. Yet, one in particular stood out to me it was owl valentines made out of toilet paper rolls super cute, but way bulkier than I wanted and where was I going to get seventeen toilet paper rolls in just a few days? 

So, although not completely origional this is my adaptation. It is really fun and doesn't take to much to do (although just a warning it was a little bit time consuming),and of course miniature is always better :).

Supplies:


1) Paper for the body approximately  1 ½  inches by 2 ½ inches. 


2) Googly eyes ( these are my favorite).


3) Paper cut outs of wings. I cut mine really small approximately  ½ an inch adapt as you like. 


4) a small square piece of paper about ½in by ½in on this write your message. I wrote Happy Owlentines Day! But feel free to be creative I have seen things like "Owl always Love you" and "Owl always be there" Pretty much just replace I'll with Owl. Let me know what you come up with! 

5) Glue pretty simple. Use this to put the eyes, wings, and message on to the body of the owl. 

6) A Pen, I used a red one to be more festive. Use the Pen to draw the beak on to your Owl. 

Your owl should look something like this at this point. You can make the body first and then glue things on but I found this to be simpler! 


7) Tape. I use tape to hold the body of the Owl together I found it faster than using the glue and waiting for it to dry. This is decorative tape that I found at Target and Michael's. Any normal tape is fine too. Really, you can hold it together whichever way you prefer. At this point you will take the body of the Owl (the larger piece of paper) and roll it up.


The last step is to make the ears just push down on the tube you have created in the back first and then the front. You may want to kind mess with each ear using your fingers to mold it and make it the way that you want it. 

Waaa laaah you now have a little Owl! 

Happy Valentine's creating ! 


Saturday, December 8, 2012

Flashlight Art

 
                                                                                (Flashlight artist Michel E.)
This last summer my friends and I went camping at the base of Mt. Evans.   
 
                                                      (Flashlight artist Raquel H.)
 That night we went on a walk around echo lake. We grabbed our tennies a couple flashlights and I of course grabbed my camera because what would a night hike be with out a camera? We were on our way.  As we sat by the lake I started to take pictures in the low light a lot of them were not really turning out very clear with out the aid of a tri pod. So I started messing around with the shutter speed and fstop. While doing this a idea popped into my head!

                                                                                       ( Flashlight artist Susan B.)
Why not slow my shutter speed way down and open my apature as to let the right amount of light in and capture the movement of the flash light we had brought with us. Even better why not have my friends trace their initials into the air! We Proceeded to do this for the remainder of the night creating a new to us style of art. It was exciting to wait in anticipation for what the camera screen would capture once the shutter closed.
 
                                                                                             ( Flashlight artist Susan B.)
So, I know this will not work for everyone, but those of you who do have a dslr of some kind grab it a flashlight and go camping or just turn the lights out. Or maybe wait a second while I explain this process. If you do not have a dslr find a friend who does have them read this and then you can be the artist behind the flashlight! Also many of you probably already have a good understanding of how this works so have fun creating your own flashlight art!
                                                                                                (Flashlight artist Raquel H.)

Its farely simple! First, you want to set your camera to the manuel setting.

                            Second, look for the little ISO icon once you scroll to that and click on it set it to 100 this gives your pictures a tighter look less grainy and normally when you are in low lighting situations you want the opposite you want a higher ISO because it alows more light in. But in this case you want the iso to be low so you do have the better quality.
                              
                           Third, find the setting for your shutter speed this is different on each camera but change this to at least 8 seconds and possibly longer this is where you will have to start playing around with what works for you. By doing this you allow more light into your camera.

                           Fourth, set your aperture ( this setting usually has a little f by it and numbers and is also known as a fstop) low inbetween aprox. 3.5- to 5.6 this also creates a larger opening in your lense to let more light in. Have fun and play around with this too in coordination with the shutter speed.

                          Fifth, Find a tripod or other solid surface. We used the picnic table at our camp sight and a rock by the lake. make sure the flashlight will be in the lense once you hit the button. then shoot and tell your flashlight artist to start moving the flashlight around it is helpful to count down for them so they can pace them selves.


                        Sixth, load your photos and unless your friends are good at writing backwards go into your computers photo editer and flip them and cropthem and play with contrast to your hearts content. That's it!

                                                        Happy flashlight shooting !!!!!!


                                                                       ( Flashlight artist, Susan B.)

Tuesday, August 14, 2012

Care Package Idea


Hello again ! This summer my little sister went to camp and I wanted to send her a package. I got online to find a cute way to do it. This idea I actually saw on pinterest but I adpated it .


First, figure out what the person recieving the care package likes. Then go to the store and gather supplies.

                                          Supply List : 1)Envelopes
                                                               2)Tape
                                                               3) Markers
                                                               4)Envelope fillers
Hard candy, Pens, lip gloss, toys, stamps, gift cards, etc........................................
In the origional idea that they had seven envelopes labeled for the seven days of the week.I decided to be different and as my sister opened the package, out came a message. You could also spell the persons name out. So, secondly choose how many envelopes you would like in the package.
Next tape all the envelopes together and decorate them. Then fill them with the goodies you bought and seal them.

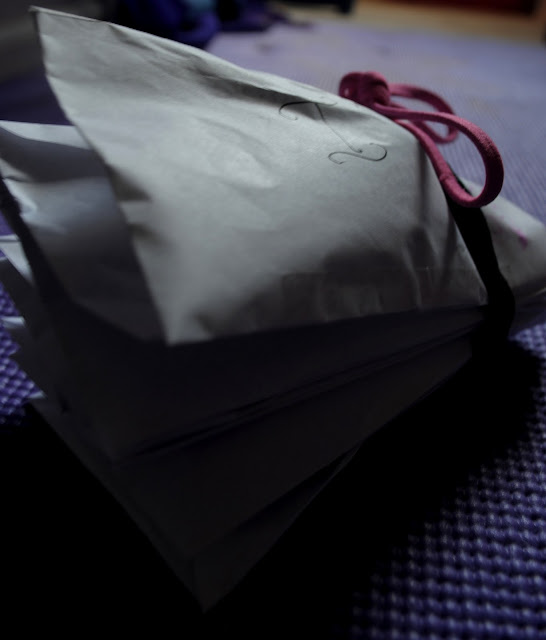
Lastly, fold it up find a cute bow or band of some sort to keep it together. I used two head bands to tie mine together. Then send it off! Enjoy the project ! ~ M.E.

Sunday, July 1, 2012

Lights

Hello! I am starting this blog to share my creative ideas, crafts, or decorations with you so you can be creative too!


As I have decorated my appartment I was continually  drawn to stringed lights. I think they bring a warm ambiance and inviting feel to a room. This last January I was in Cambodia in the russian market. I saw these little lights for $2.50 and was sold. They add the perfect accent above the bed. So, the next time you are in a foreign country check out their markets and see what amazing decorations might be awaiting you. Also I believe hobbie lobbies sometimes carry these similiar decorations or possibly world market.

                                                                     ~M.E.